サブドメインを作りたいんだけど、どうやるんだろう?
mixhostなら簡単にサブドメインを作れますよ。
ここでは、mixhostでサブドメインを作成する方法を解説します。
サブドメインとは
サブドメインとは、独自ドメイン「○○○.com」の前に文字列を挿入し、「△△△.○○○.com」のようにして区分けするドメインをサブドメインといいます。
サブドメインは、ドメインを用途や目的別に分割して利用する際に使われます。
Yahoo!の場合を例にすると、以下のようにドメインとサブドメインが使用されています。
・https://www.yahoo.co.jp/
(本体ドメイン/Yahoo! JAPAN)
・https://auctions.yahoo.co.jp/
(サブドメイン/Yahoo!オークション)
・https://news.yahoo.co.jp/
(サブドメイン/Yahoo!ニュース)
mixhostでサブドメインを作成
cPanelでサブドメインを追加
(1)mixhostのマイページにログインします。
①でメールアドレスを、②でパスワードを入力し、③「ログイン」をクリックします。

(2)①「cPanelにログイン」をクリックします。

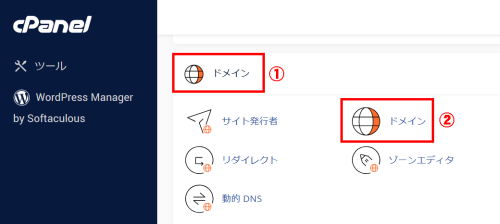
(3)①「ドメイン」の②「ドメイン」をクリックします。
(4)「新しいドメインを作成」をクリックします。

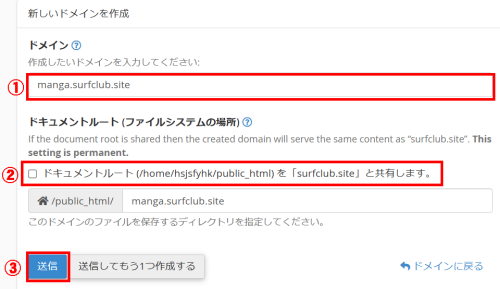
(5)①に作成したいサブドメインを入力します。
②のチェックをはずします。
③「送信」をクリックします。
(6)「成功」と表示されたら、完了です。

SSL証明書を手動で発行する
(1)mixhostでは、独自ドメインがサーバーに紐づけられると自動でSSLが設定されます。
SSL設定されたサイトは、URLが「https」となります。
サブドメインも同様に、サブドメインが作成されると自動でSSLが設定されます。
SSLの設定には時間がかかります。SSL証明書が有効化されるまで24~72時間程度かかります。
しかし、以下の手順を行うと、SSL証明書を手動で発行することができ、通常30分以内に完了します。
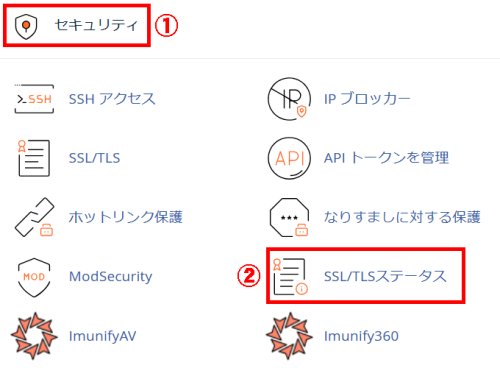
cPanelの①「セキュリティ」の②「SSL/TLSステータス」をクリックします。
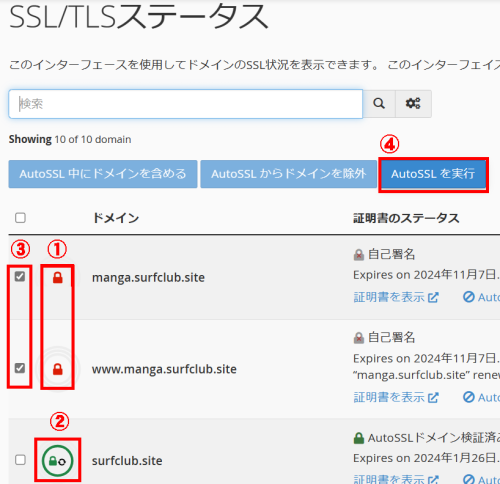
(2)①では、鍵のマークが赤くなっています。これはSSL設定が完了していない状態です。
完了すると②のように緑になります。
③にチェックを入れ、④の「AutoSSLを実行」をクリックします。
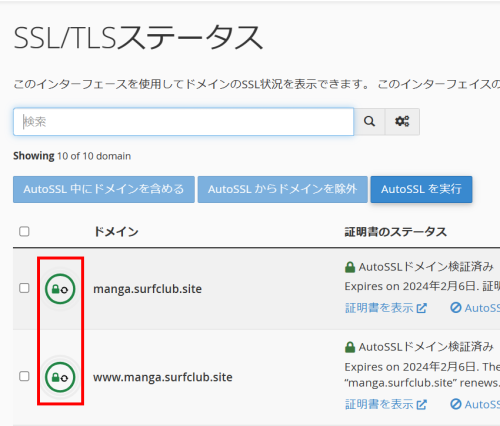
(3)30分ほどで以下のようにSSL設定が完了します。
サブドメインにWordPressをインストールする
サブドメインにWordPressをインストールする方法は、以下を参照してください。
